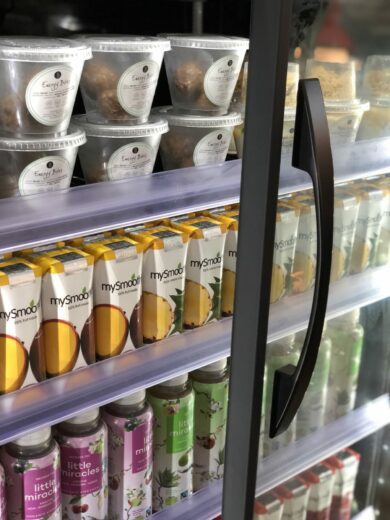
Kitchen equipment has been sitting empty for months since the start of the Coronavirus pandemic, which can lead to technical problems when it’s time to switch back on.
We caught up with True’s Technical Director EMEA, Wilco Koerntjes, and Regional Technical Manager, Dave Lowe, to discuss common issues you may face when turning on your units.
What should I check before I turn my refrigerator on?
How do I clean the unit before use?
How long should I wait to use my unit after turning it on?
I’ve turned on my unit and it’s still not working
How do I check the temperature of my refrigerator once it’s up and running?
Why is the temperature I recorded different to the display?
The temperature of my unit is high, what do I do?
Why does my unit smell bad?
What do I do if there is excessive heat coming from my refrigerator?
What maintenance can I do to prevent problems in the future?
What should I check before I turn my refrigerator on?
There are several things to check before you turn on your True refrigerator or freezer:
Electrical Components
Take a look at your power cable and plug. Often these components can be damaged while equipment is moved around as they get dragged along the floor. Examine the power cable for exposed wire and check the fuse. If either of these are damaged, they need to be replaced as soon as possible.
Condenser Coil
Another key part to check before you turn on the unit is the condenser. This is a key part of the refrigeration system, so if it’s dirty or blocked it can negatively affect the performance of your unit.
You can usually see if the condenser coil is dirty with a simple inspection. But you can also shine a torch through the coil and if the light doesn’t shine through clearly, it’s time for a clean.
Cleaning instructions can be found below.
Gaskets
Examine the gaskets for damage and dirt. If they are damaged, they will need replacing as it can break the seal on the doors, allowing warm air to enter the unit. Speak to your servicing engineer about replacement gaskets.
If they are dirty, clean them with warm soapy water. Ensure the gaskets are completely dry before you turn the unit on as the water may freeze and cause damage.
Doors
Finally, check the door’s self-closing mechanism. If this isn’t working properly warm air can get into the unit and affect the performance. If you notice a problem, speak to your servicing engineer.
True Top Tip: Check all the key areas of your unit for damage and dirt before switching it on.

How do I clean the unit before use?
After a long period of downtime, it’s important to clean your refrigerator before it’s turned on. Ideally, it would be cleaned after it was turned off, so cleaning won’t take too long.
When cleaning your refrigerator there’s no need to use harsh chemicals for most areas, as this can damage the materials over time. Instead, use warm soapy water with a cloth or sponge.
Condenser Coil
Start by removing any dust from the coil, this can be done with a vacuum.
Then, shine a torch through the coil to check for grease, if the light doesn’t completely shine through, the coil is greasy and needs a clean. Wash thoroughly with a de-greasing cleaner and rinse with fresh water to prevent damage to the copper and aluminium.
Evaporator Drain Tube
Clean out the internal drain by pouring hot water down it and push any debris out the bottom using a pipe cleaner.
Condensate Pan
Empty out the condenser tray if there is anything in it, then clean with hot soapy water. Loose food particles can get stuck here which will start to smell over time, so make sure it’s cleaned well.
Interiors
Use a soft brush and clean the shelves and surfaces with warm water and soap. If the shelves and drawers need a deeper clean, soak them in warm, soapy water and rinse clean.
Stainless-Steel
Clean any stainless-steel exteriors with a soft cloth and warm soapy water. If there are stubborn stains, use a mixture of baking soda and warm water.
True Top Tip: Clean your unit before the reopening to avoid smells and improve efficiency.
How long should I wait to use my unit after turning it on?
After you turn the unit on, it must be left empty for at least 12 hours to reach optimum temperature.
After 12 hours you can start to fill the unit with stock. Ideally the stock is pre-chilled, so the temperature isn’t affected. If it’s not possible to pre-chill the stock, fill up the unit in batches allowing time for the unit to cool back down after each batch.
This is because stock, especially liquids, carries latent heat that will increase the temperature of the refrigerator and the forced air systems will be moving warm air around the unit instead of cool air.
True Top Tip: Wait 12 hours after turning on your unit to allow it to get to temperature.

I’ve turned on my unit and it’s still not working
First, check the unit is turned on both at the power socket and on the unit itself. The location of the power switch will depend on the unit.
If it is still not working after this, please talk to your service engineer.
True Top Tip: Check the power switch on both the power socket and the unit itself.
How do I check the temperature of my refrigerator once it’s up and running?
It’s important to check the temperature of your unit after it’s turned on to ensure it’s working properly. While the display does indicate the temperature, we recommend doing a manual check as well.
Use a calibrated thermometer and place it into some produce in the refrigerator and close the door. After at least 15 minutes check the temperature.
Repeat this in several areas of the unit to ensure the air is flowing properly and the temperature is constant across the unit. You can also check the airflow by putting your hand into the unit so you can feel the air moving.
If you’re more confident with the technical aspects of a refrigerator, take a look at the evaporator fan to check it’s moving.
True Top Tip: Regularly do your own temperature checks.
Why is the temperature I recorded different to the display?
Sometimes, the temperature you record is different to what’s shown on the display, do not panic. The display is simply a guide, which is why it’s important to do your own checks.
This could be because the unit is still getting to temperature. Ensure you have waited 12 hours after turning it on to check the temperature.
This can also happen when the unit is in defrost mode and once the unit has finished the defrost cycle, the temperature and display will return to normal.
There can also be inaccuracies in the display if the doors are being opened a lot and not closed properly. This is because the cold air escapes and warm air is allowed in which increases the overall temperature.
True Top Tip: Don’t panic if your display temperature is high – do your own checks to verify the temperature.

The temperature of my unit is high, what do I do?
First thing to check is the temperature setting on your refrigerator. This is a dial with numbers 1-9 on your unit. Setting 9 is the coldest, so if your refrigerator is too warm, try turning up the dial a few points. We recommend setting 5 for the optimum temperature.
If the dial is set correctly, but the temperature is too high, you may have overfilled the unit. Overfilling can lead to the airflow being blocked, meaning cool air cannot circulate around the unit, hence raising the temperature. Try removing some stock to see if this makes a difference to the temperature.
We also recommend removing any cardboard packaging that your stock is delivered in. The cardboard acts as an insulator, meaning your stock will take longer to get to the right temperature. It can also block airflow, take up space, and doesn’t look as good for displays.
High temperature could be due to a dirty condenser. This can impact the efficiency of the unit, ultimately increasing costs and emissions. Cleaning tips for your condenser can be found above.
True Top Tip: High temperatures may be because your unit is too full.
Why does my unit smell bad?
The most common cause of a bad-smelling unit is food being left in the unit and spoiling. To ensure no food particles are left behind, give your entire unit a deep clean.
Common places for food build-up are on the shelves and in the condenser pan, so make sure to give these areas extra attention.
True Top Tip: Give your unit a deep clean if bad smells persist.
What do I do if there is excessive heat coming from my refrigerator?
Excessive heat coming from your unit can be a bad sign, but don’t panic. Turn off your unit and check the condenser isn’t blocked and give it a clean if it is.
If the condenser is clean and the unit is still overheating, get in touch with your servicing engineer as soon as possible.
True Top Tip: A dirty condenser can cause the unit to overheat.
What maintenance can I do to prevent problems in the future?
Preventative maintenance is key to ensuring your refrigerator stays in the best condition. In the same way you regularly clean a car and get a yearly service, your refrigerator has to be looked after.
We recommend a service 1-2 times per year, depending on how much use the unit gets.
The gaskets should also be checked once a month. Cracks in the gaskets can prevent the doors from sealing, so cold air escapes and the temperature inside the unit increases.
We also suggest you clean the condenser coil once a month to ensure the unit remains as efficient as possible. Although, this may be required more regularly if the unit is used a lot in a high-pressure environment.
It’s also important to ensure the evaporator coil is checked regularly. It must be clean and clear, otherwise the airflow will become blocked leading to the coil freezing, water leaks and a rise in temperature.
Finally, regular cleaning of the interiors and exteriors, including the drain pans, will help to prevent bad smells and ensures your unit is working at peak efficiency.
True Top Tip: Regularly clean your unit to keep it in peak condition.

Further Help
We hope these tips have helped, should you run into any issues with your refrigerator.
If you’re still having trouble with your unit after trying these steps, please get in touch with your servicing engineer.
If you do not know who your nearest servicing engineer is, feel free to talk to our team and we’ll point you in the right direction.


